Octobox - Notifications filter
This contribution is a new feature.
Introduction

Project
You can find the Octobox project presentation here.
To access Octobox.io you just need to sign in with your GitHub profile or install the GitHub app on the homepage.
Context
Current behavior
In order to understand the current behavior you need to be familiar with what a GitHub notification is.
Notifications provide updates about the activities and conversations you're interested in.
In the Octobox context, they can be of three different types: Issue, Pull request or Vulnerability alert.
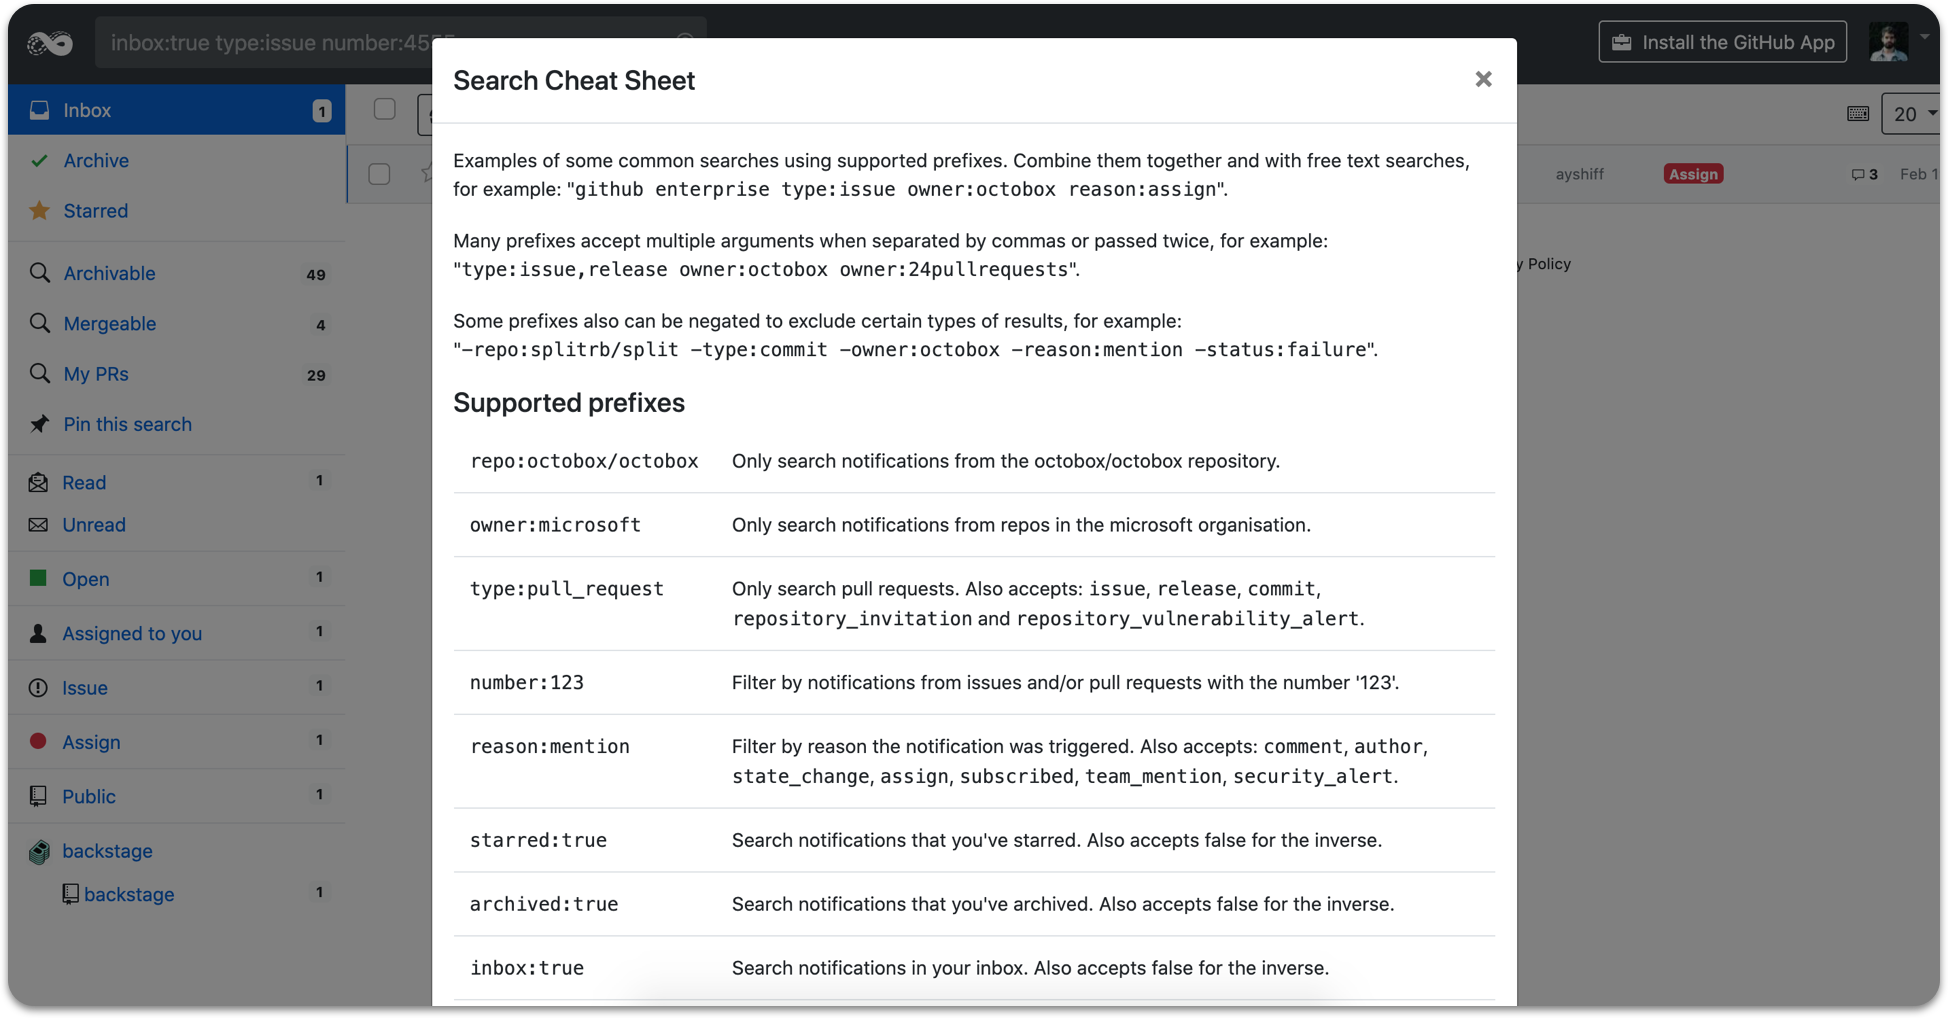
Users can currently refine their notifications with specific filters.
Here is a list of some filters that can be used:
- repo:
octobox/octoboxOnly search notifications from the octobox/octobox repository. - owner:
microsoftOnly search notifications from repositories in the microsoft organisation. - type:
pull_requestOnly search pull requests. Also accepts: issue, release, commit, repository_invitation and repository_vulnerability_alert.
The goal of this contribution is to add filtering based on the issue number and/or the pull-request number like GitHub does:

Setting up the project
In order to contribute to the project, we will need to set up certain elements.
Fork and clone the Octobox repository to our local machine.
git clone git@github.com:<OUR_GITHUB_USERNAME>/octobox.git # Using SSHInstall Ruby 2.7.2 using rbenv which is a version manager for Ruby.
It will allow us to install the correct version of Ruby for our project.brew install rbenv ruby-build
rbenv install 2.7.2
rbenv global 2.7.2Install PostgreSQL which will be used to store our notifications.
brew install postgresInstall the "Gems" dependencies from the
Gemfilegem install bundler && rbenv rehash
bundle installCreate the databases and tables with "Rake"(it is a task runner in Ruby).
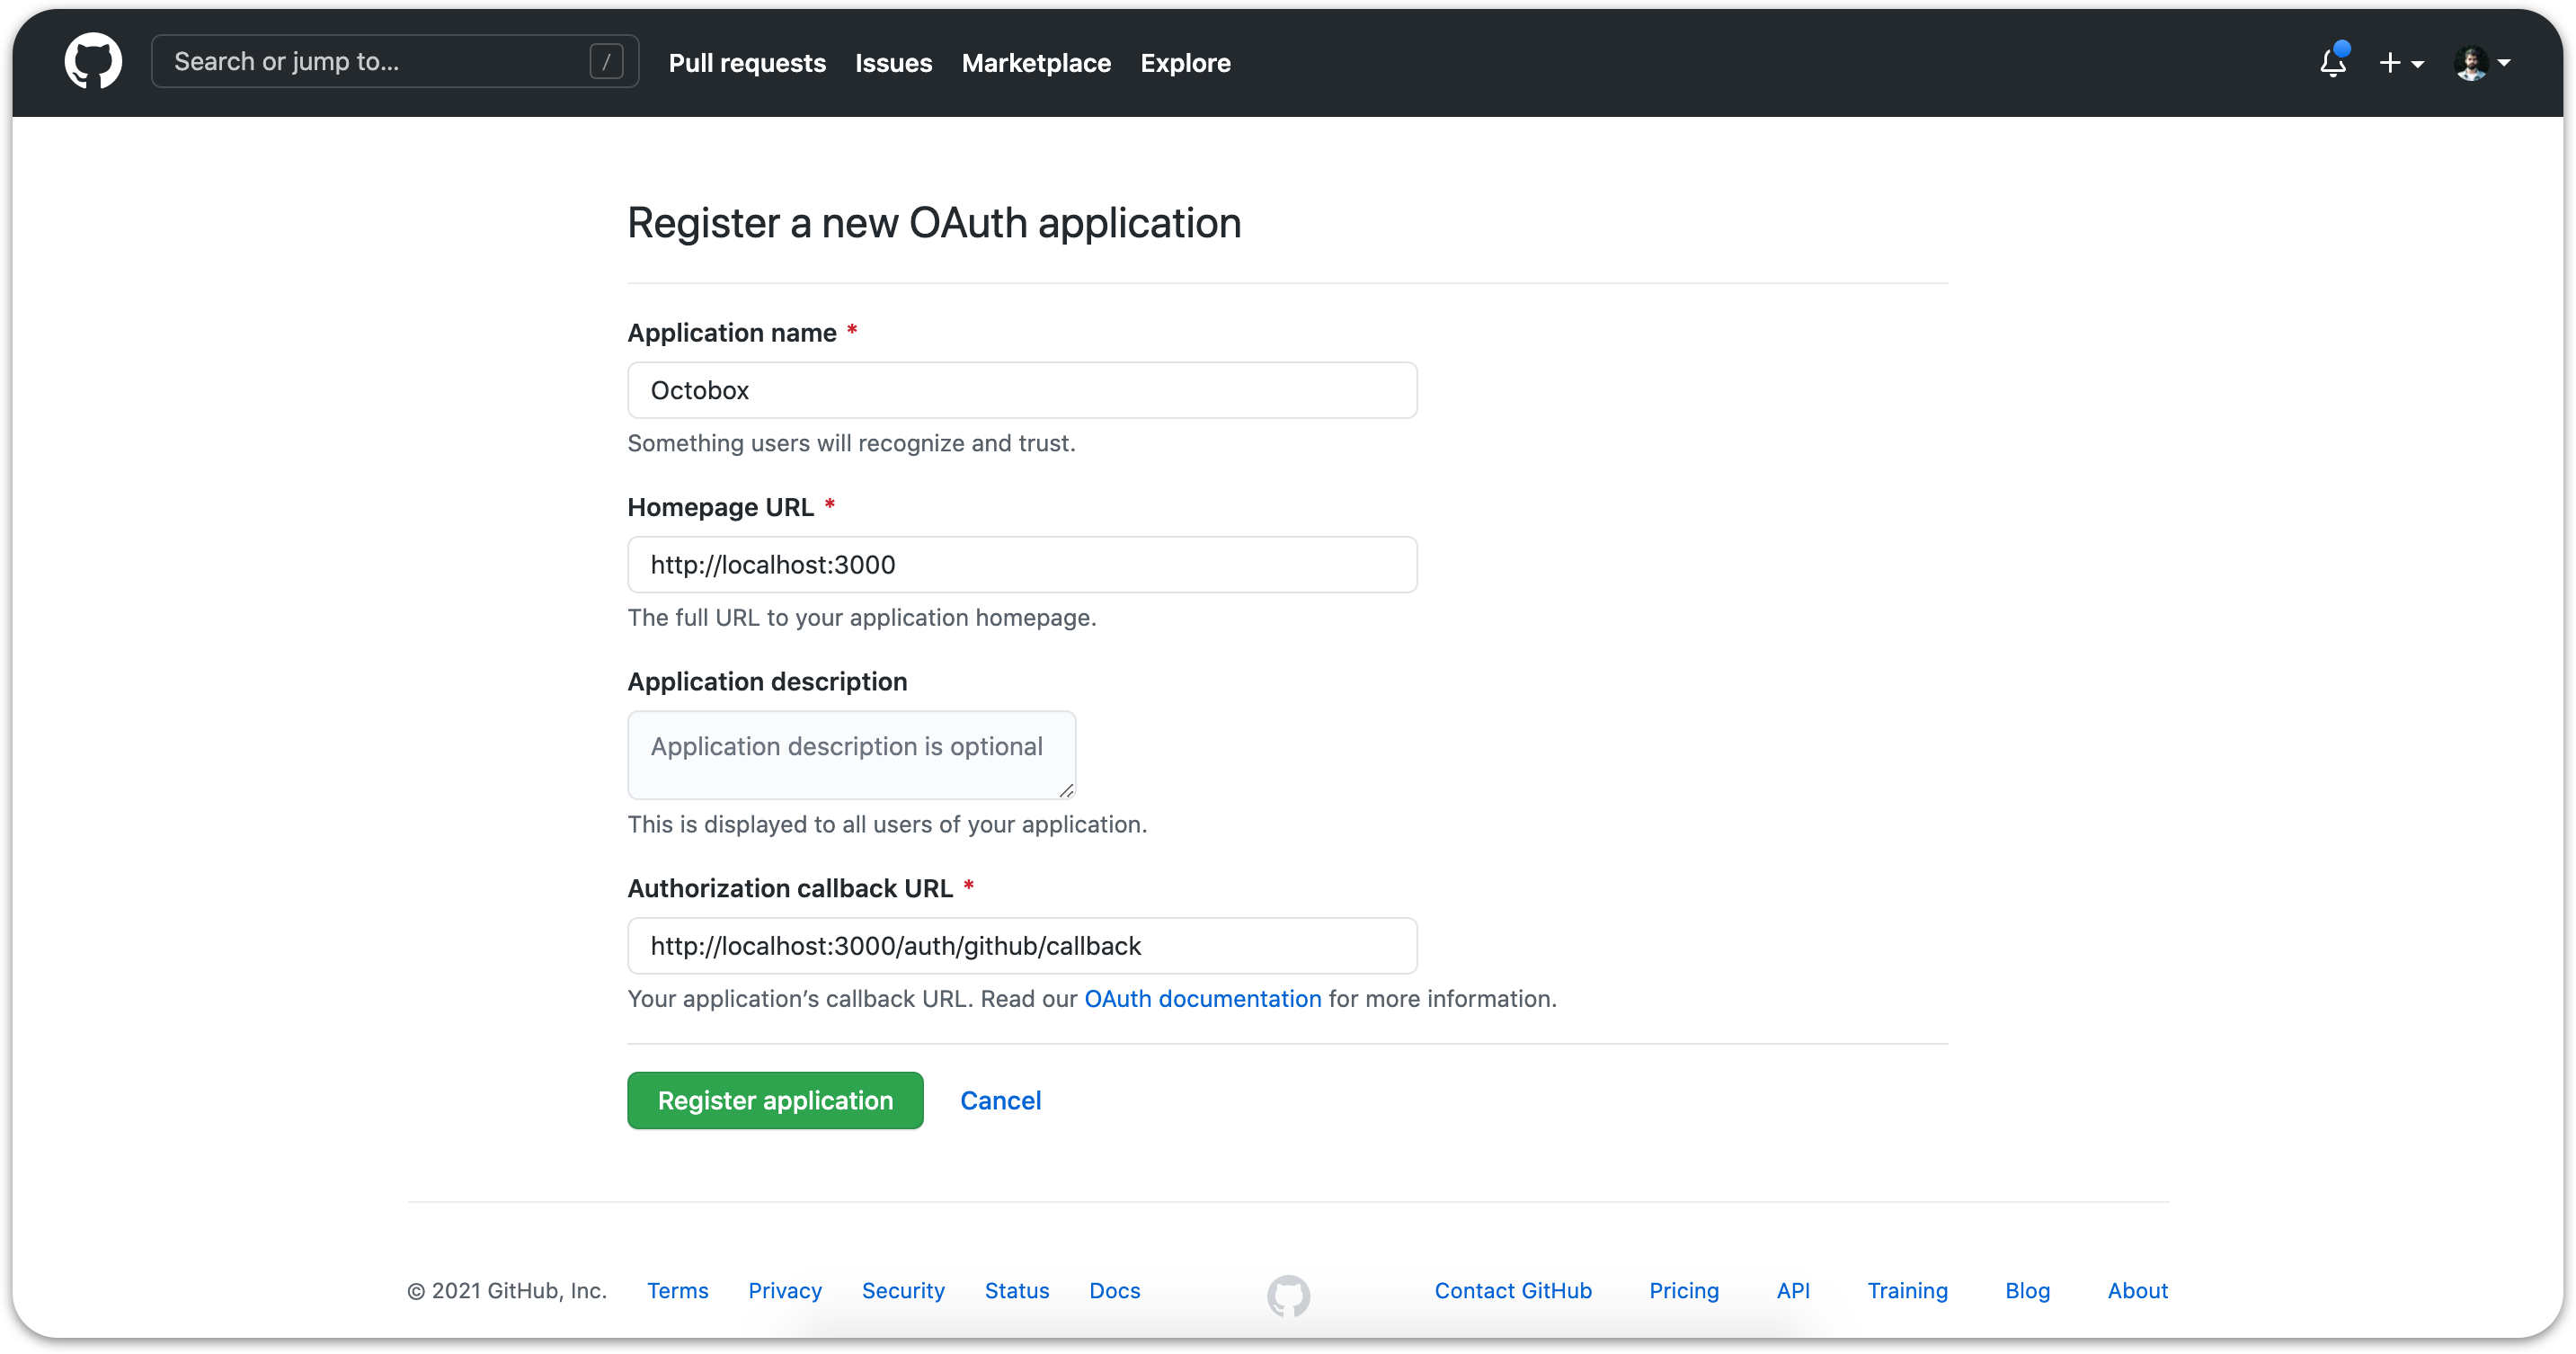
bundle exec rake db:create db:migrateRegister a new GitHub OAuth Application.
It will allow us to connect our GitHub identity to our local Octobox instance using OAuth and to retrieve our account notifications.

Once this step has been completed, we need to write down the client id and client secret and create an
.envfile with the following content:GITHUB_CLIENT_ID=<OUR_GITHUB_CLIENT_ID>
GITHUB_CLIENT_SECRET=<OUR_GITHUB_CLIENT_SECRET>Make sure that PostgreSQL is running and start the project with:
rails s
Now that our project is running locally, we can start implementing the solution.
Implement the solution
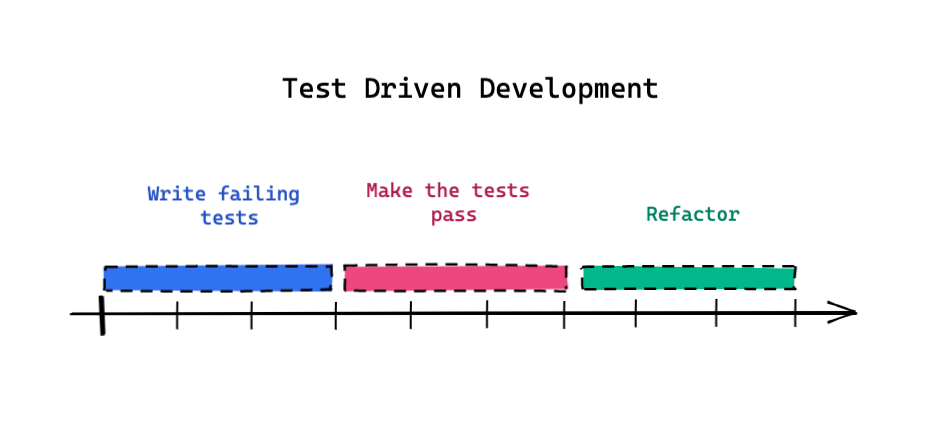
We will follow the TDD (Test Driven Development) approach by developing test cases to specify and validate what the code will do.
Moreover, it will allow us to do refactoring afterwards by making sure that the functional part is good.

Add the failing tests
To filter the notifications based on their reference numbers, we need to validate that our Search engine will correctly converts our params to the right query prefix.
class SearchTest < ActiveSupport::TestCase
  # ...other tests
  test 'converts number params to number prefix without changing it' do
    search = Search.new(query: 'inbox:true', scope: Notification.all, params: {number: '123'})
    assert_equal search.to_query, 'inbox:true number:123'
  end
end
The following tests will allow us to test that the notifications are properly filtered based on the number(s) we specified in the search input.
For example, given the following search input, the following URL will be used.
/?q=inbox%3Atrue+type%3Aissue+number%3A4555
NOTE: When building a URL, we must ensure that it contains only valid characters.
All characters to be URL-encoded are encoded using the % character and two hexadecimal digits corresponding to their UTF-8 character.
This means that 3A corresponds to the character : and + to a space (the real encoding uses %20 but form data in URLs uses +).

Search bar component
require 'test_helper'

class NotificationsControllerTest < ActionDispatch::IntegrationTest
  # ...other tests
  test 'search results can filter by number' do
    sign_in_as(@user)
    notification1 = create(:notification, user: @user, subject_type: 'Issue')
    notification2 = create(:notification, user: @user, subject_type: 'PullRequest')
    subject1 = create(:subject, notifications: [notification1])
    subject2 = create(:subject, notifications: [notification2])
    get '/?q=number%3A' + subject1.url.scan(/\d+$/).first
    assert_equal assigns(:notifications).length, 1
    assert_equal assigns(:notifications).first.subject_url, subject1.url
  end

  test 'search results can filter by multiple numbers' do
    sign_in_as(@user)
    notification1 = create(:notification, user: @user, subject_type: 'Issue')
    notification2 = create(:notification, user: @user, subject_type: 'PullRequest')
    subject1 = create(:subject, notifications: [notification1])
    subject2 = create(:subject, notifications: [notification2])
    get '/?q=number%3A' + subject1.url.scan(/\d+$/).first + '%2C' + subject2.url.scan(/\d+$/).first
    assert_equal assigns(:notifications).length, 2
  end
end
Make our tests pass
In order to make our tests pass, we will need to implement different things:
- Add a new param
numberfor the search model which will be used to query the right filters. - Add a new
numberscope which will be used to select the notifications from our table with a number which matches to our. - Add a new
-numberscope which will be used to select the notifications from our table with a number which is different to our.
Add the new search params
This step involves adding our two new params number and -number.
It will allow us to pass the right information to the scopes who will take care of the logic to retrieve the corresponding notifications in our database.
exclude_number works as a negative filter and will therefore filter in the opposite way to number: -number.
We will update our Search model to add our new params.
class Search
  attr_accessor :parsed_query
  attr_accessor :scope

  def initialize(query: '', scope:, params: {})
    @parsed_query = SearchParser.new(query)
    @scope = scope
    convert(params)
  end

  def results
    res = scope
    # This is used to get our parsed_query :number
    res = res.number(number) if number.present?
    res = res.exclude_number(exclude_number) if exclude_number.present?
    # ... other params
  end

  def number
    parsed_query[:number]
  end

  def exclude_number
    parsed_query[:'-number']
  end

  def convert(params)
    # ... other params
    [:repo, :owner, :author, :number].each do |filter|
      next if params[filter].blank?
      @parsed_query[filter] = Array(params[filter])
    end
  end
end
We will also need to add our new filter to the filter list inside the notifications helper.
In particular, it will be useful for displaying the filter in the list of selected filters thanks to the filter_option helper. (see the search filter element section)
module NotificationsHelper
  def filters
    {
      reason:          params[:reason],
      unread:          params[:unread],
      repo:            params[:repo],
      number:          params[:number],
      # ... other filters
    }
  end

  def filter_option(param)
    if filters[param].present?
      link_to root_path(filters.except(param)), class: "btn btn-sm btn-outline-dark" do
        concat octicon('x', :height => 16)
        concat ' '
        concat yield
      end
    end
  end

  # ... other helpers
Add the scopes
Now that we have the filters requested by the user, all we have to do is retrieve the corresponding elements.
There is one property of the notification element that we will use: subject_url.
The subject_url property is in the following format:
https://github.com/octobox/octobox/issues /2520 (with the reference number at the end of the url).
Note that if the number filter is combined with the type filter, it will only search notifications of this type.

In the inclusive case we need to retrieve the notifications that have a reference number that corresponds to the one we provide.
scope :number, ->(subject_numbers)  {
  joins(:subject).where(
    subject_numbers.map { |subject_number|
      arel_table[:subject_url].matches("%/#{subject_number}")
    }.reduce(:or)
  )
}
In the exclusive case we need to retrieve the notifications that have not a reference number that corresponds to the one we provide.
scope :exclude_number, ->(subject_numbers)  {
  joins(:subject).where.not(
    subject_numbers.map { |subject_number|
      arel_table[:subject_url].matches("%/#{subject_number}")
    }.reduce(:or)
  )
}
Add the helpers
Now that we have developed our new filtering system, all we have to do is add various helpers that will allow the user to use our filters correctly.
Add the search filter element
In order to help the user visualize the filters that are currently selected, we will add a new element to the _filter-list view.

Search filter component
<%= filter_option :number do %>
  Number: <%= params[:number] %>
<% end %>
Add the filters list helper
To help the user use the correct filters, a modal-component is available.
It display some information to the user about the different filters he can use.

<tr>
  <td>
    <code>number:123</code>
  </td>
  <td>Filter by notifications from issues and/or pull requests with the number '123'.</td>
</tr>
Final result
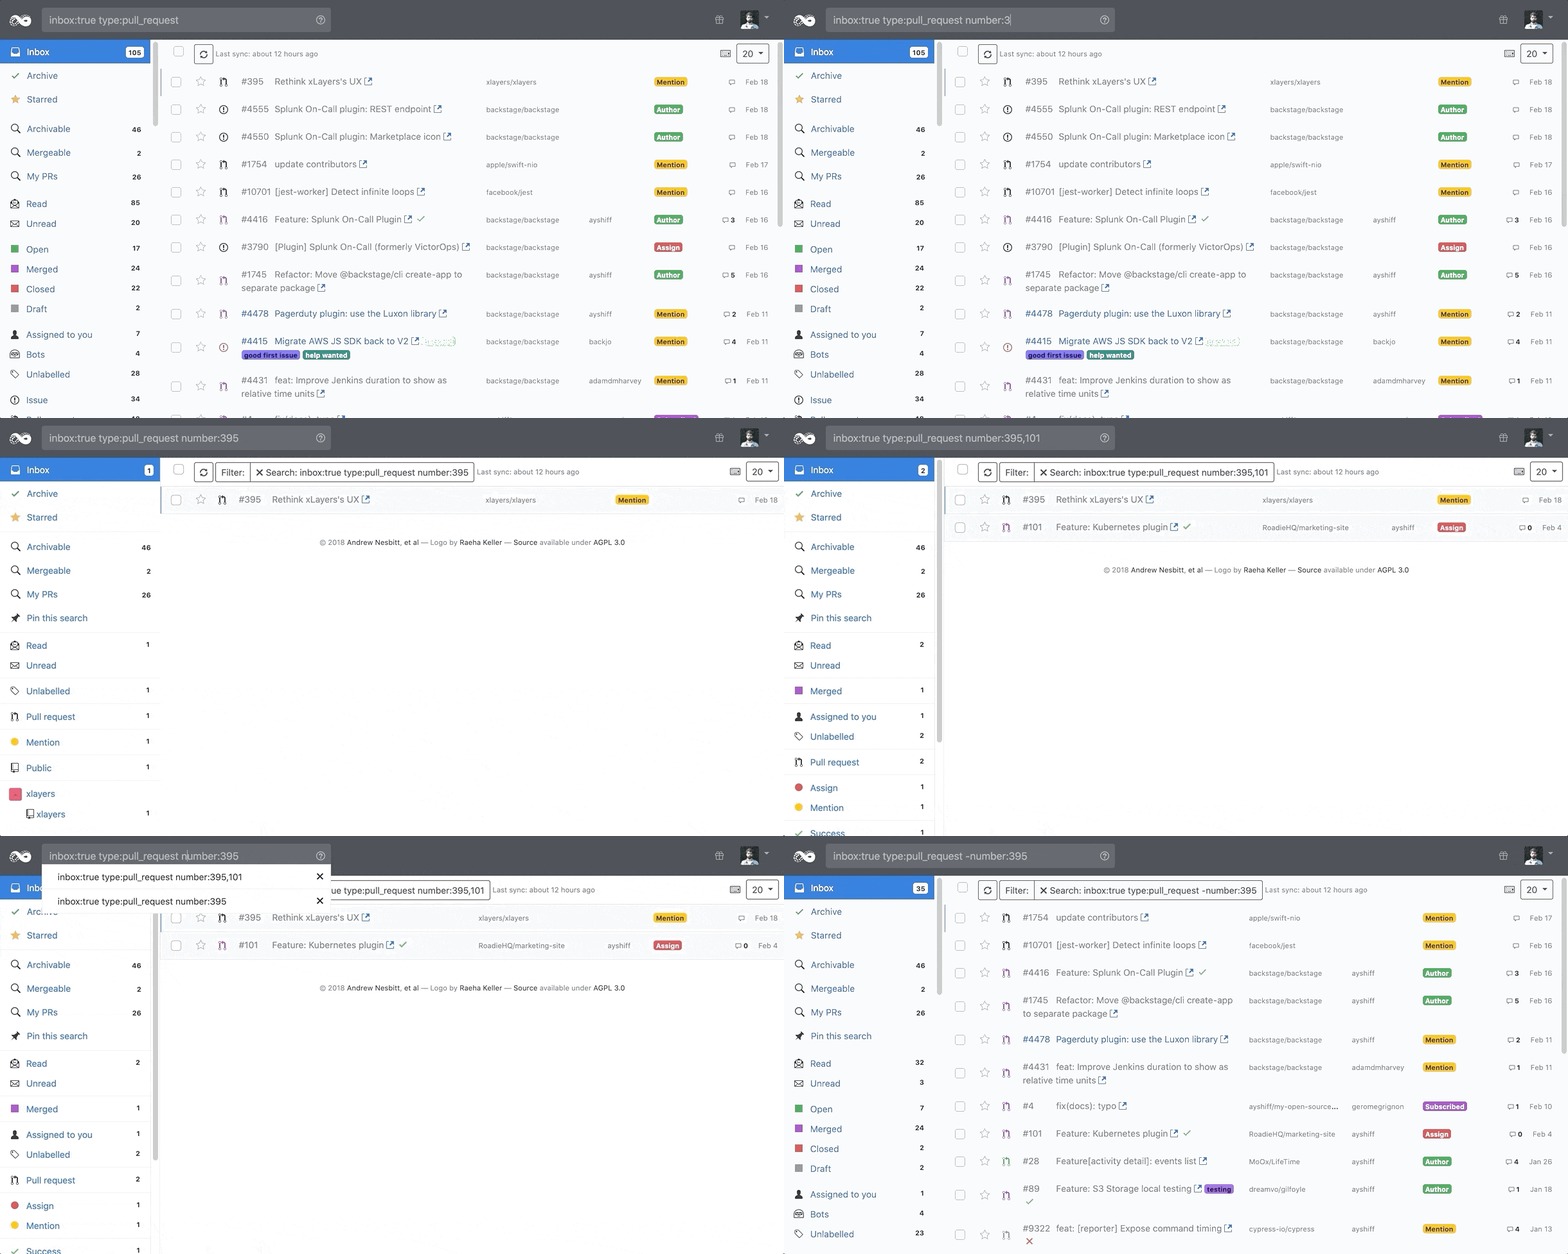
Here is the final result with a sample workflow:
- Filtering by only one reference number
- Filtering by multiple reference numbers
- Filtering with a negated reference number

Takeaway
Problems encountered
I did not have any major problems with this contribution.
The local setup of the project was a bit long (configuration of the GitHub OAuth Application, setting up postgres/redis...) especially for the configuration of the ruby version where I had incompatibilities between the rbenv version and my local ruby version using rvm.
But it gave me a better idea of how the project worked.
What did I learn ?
This contribution allowed me to learn more about Ruby On-Rails and its usage in a concrete project.
Ruby is not a language I usually use, it allowed me to use a different language from the ones I usually use.